
Last updated November 22, 2026
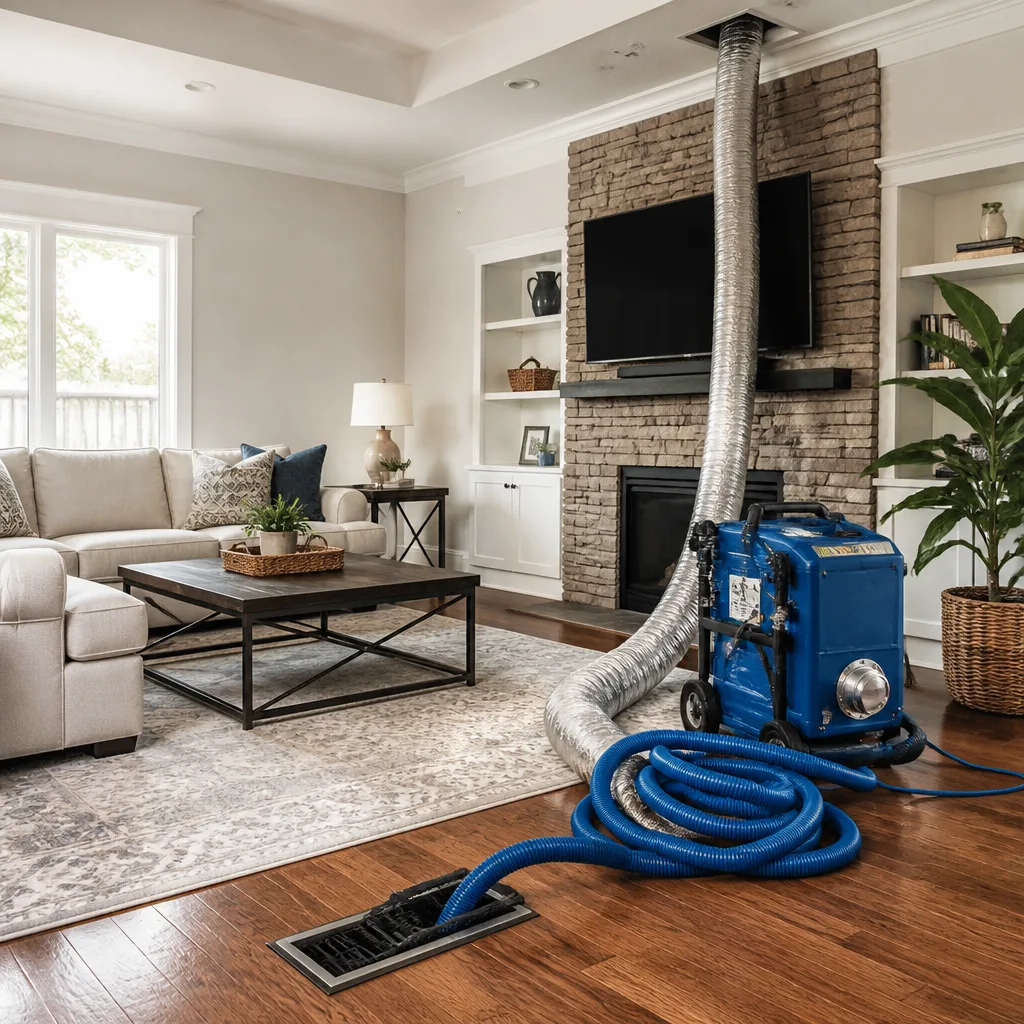 Whole-home duct cleaning
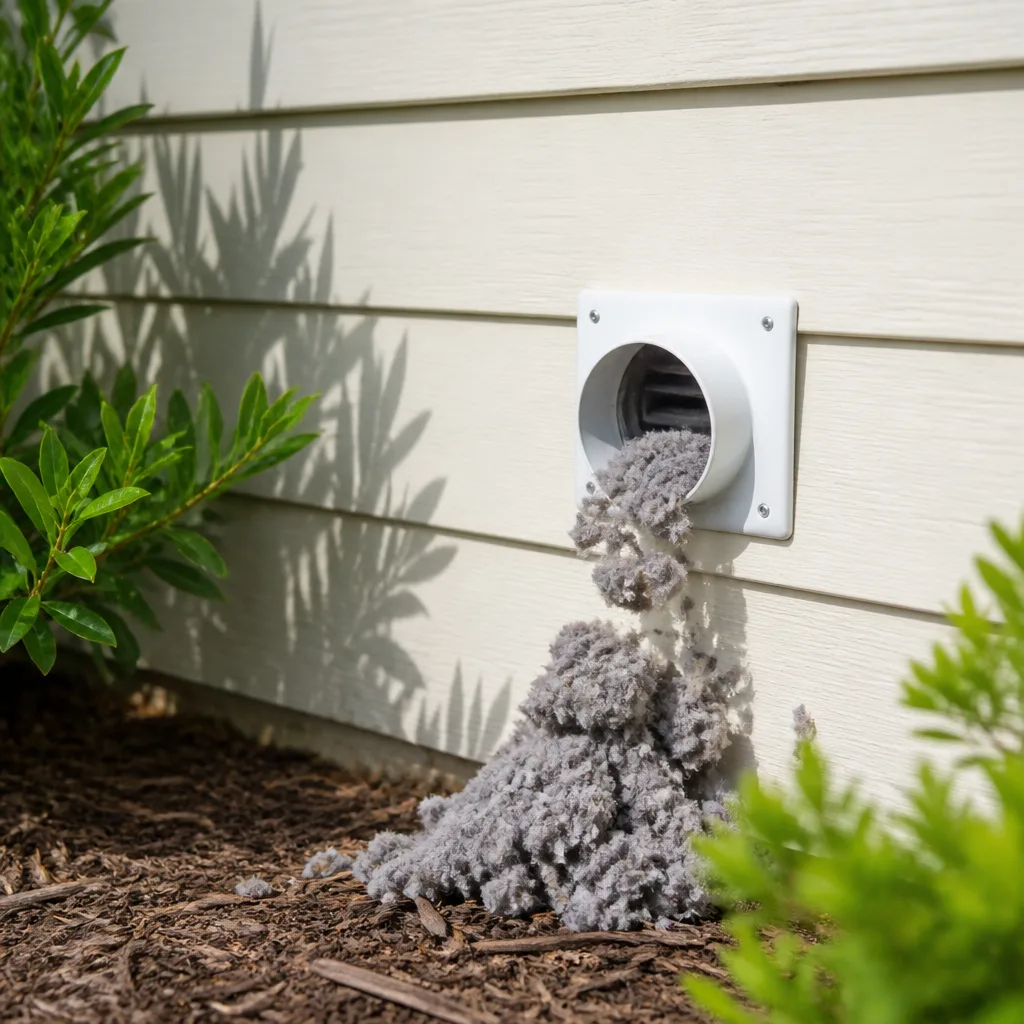 Dryer vent cleaning
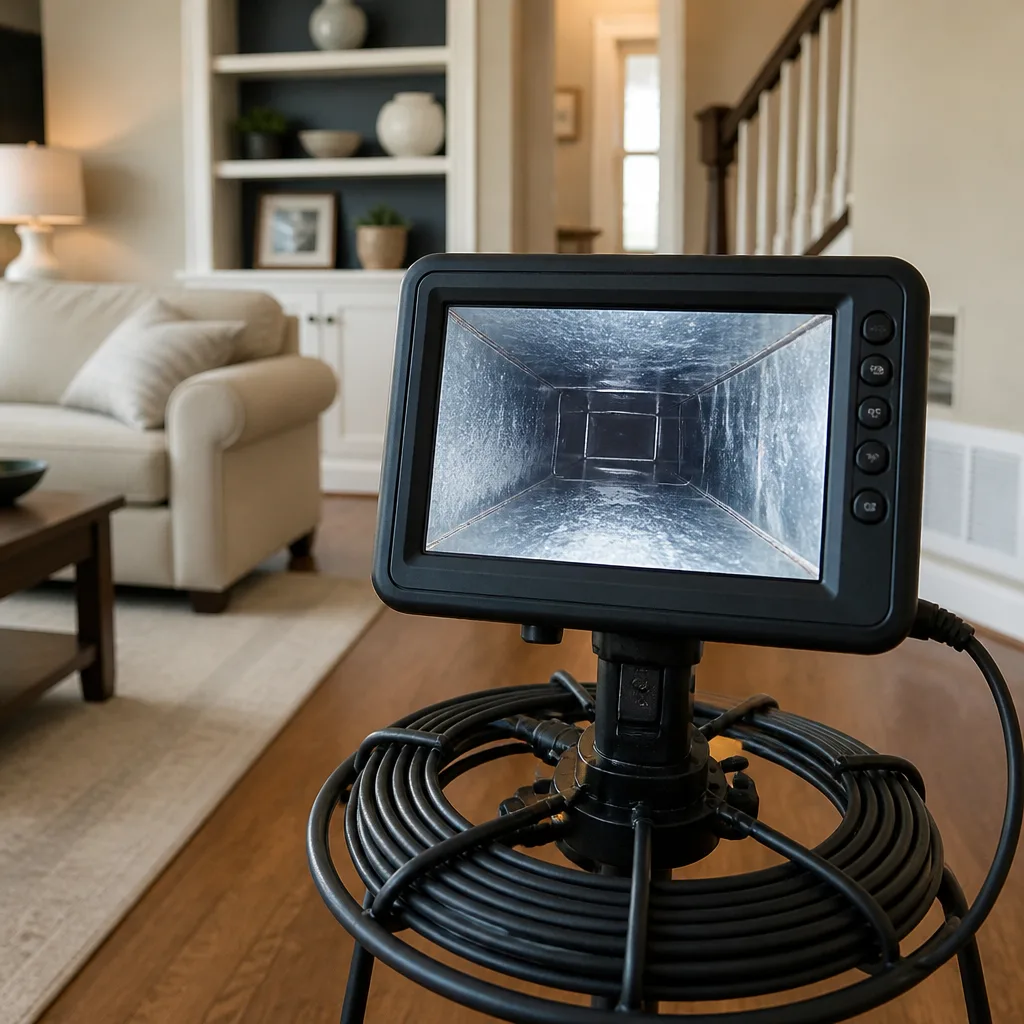 Camera inspection
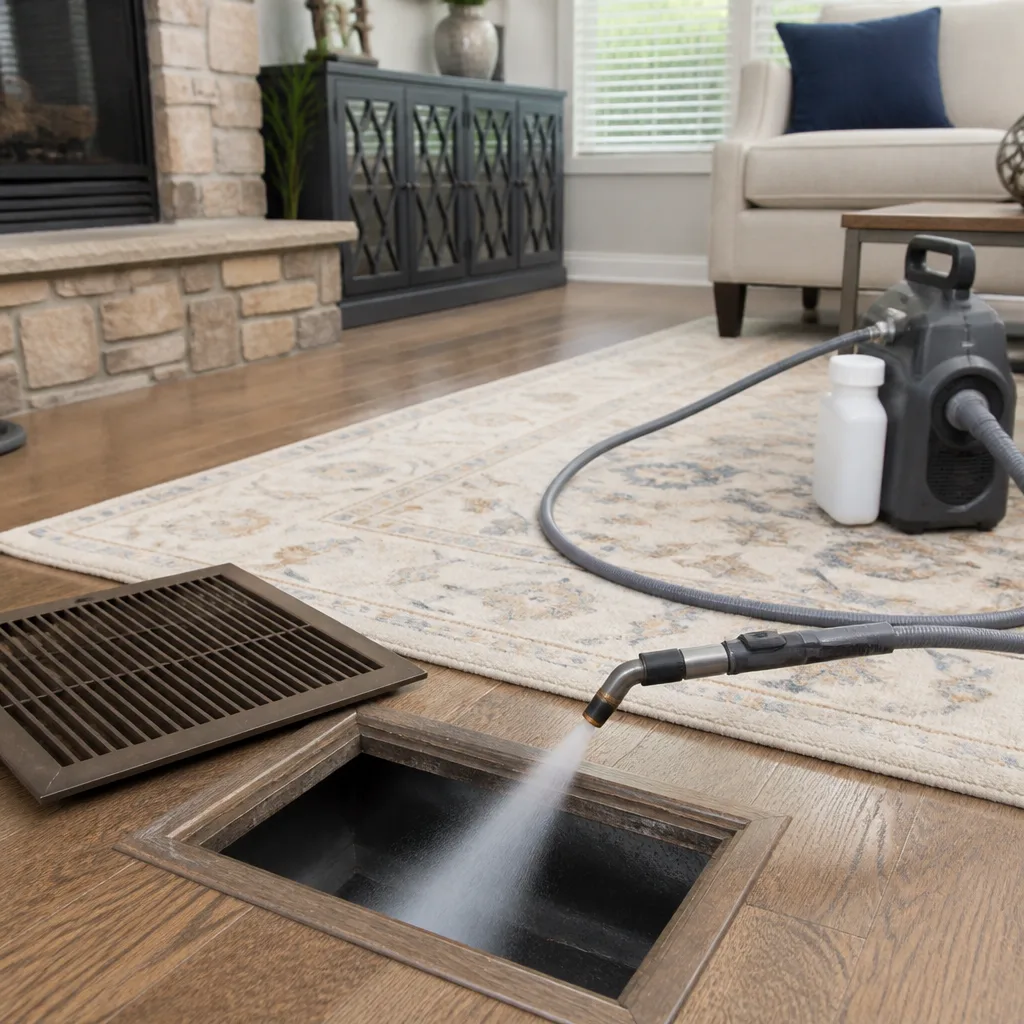 Sanitizing & deodorizing
Whole-system duct and dryer vent check with before-and-after photos - you see exactly what came out of your vents
That "$99 whole-house special" is a bait ad - the real number appears once they are in your hallway, or the "clean" is a shop-vac at the register. We photograph the inside of your ducts before and after instead.
Air Duct Cleaning Maintenance Checklist for Hell’s Kitchen Homeowners
If your maintenance checklist only says “change filter every 90 days,” you’re using a template written for someone in a suburb with no subway construction outside their window and no Con Ed steam pipes running under the street. Hell’s Kitchen is a different environment entirely. Between the constant street work along Ninth Avenue, the humidity that settles into pre-war brick in July, and the mix of radiator heat and supplemental split systems in most retrofitted apartments, your ductwork faces pressures a generic calendar can’t account for. What follows is a checklist built as a diagnostic tool, not a reminder. You’ll learn which local triggers actually accelerate contamination, how to read your own filters for real information, and the specific conditions that mean it’s time to call someone.
Quick Answer
A practical air duct maintenance checklist for Hell’s Kitchen apartments means checking filters monthly and reading them for color, texture and load distribution rather than just “dirtiness”; logging your registers with phone photos every month so you can spot changes; watching for seasonal triggers specific to this neighborhood (construction dust, humidity spikes, heating-to-cooling transitions); and knowing the red-line conditions that call for a professional inspection. Full whole-system cleaning in a typical Hell’s Kitchen apartment is best scheduled every two to three years, sooner if you’re near active construction or have allergy concerns. Nobody should follow a 90-day filter rule in this neighborhood without checking what the filter is actually catching.
Styles & brands we work with
- Whole-home duct cleaning
- Dryer vent cleaning
- Camera inspection
- Sanitizing & deodorizing
Table of Contents
- Seasonal Triggers in Hell’s Kitchen That Accelerate Dust
- How to Read a Filter: Beyond “Looks Dirty”
- Building a Month-by-Month Photo Log of Your Registers
- Checklist for Radiator Heat + Split-System Apartments
- Red-Line Thresholds: When “Monitor” Becomes “Call Now”
- The Annual Hell’s Kitchen Duct Maintenance Calendar
- Dryer Vent: The Item Most Checklists Leave Off
Seasonal Triggers in Hell’s Kitchen That Accelerate Dust
Hell’s Kitchen sits in a part of Manhattan where the environment changes from block to block and month to month. A checklist built for a suburban house won’t tell you that your ductwork is loading up during specific windows of the year, but here you can actually watch it happen. The most useful maintenance habit is knowing which windows matter and what to check during each one.
Spring and fall are the transition periods, and they’re the ones most homeowners misread. During those weeks, buildings switch from heating mode to cooling mode, and every one of those transitions kicks a burst of settled particulate through the system. If your apartment has radiator heat in winter and a supplemental split system for summer, the split system sits idle for months collecting dust on its coils, and then the first cooling cycle pushes that dust straight into the living space. Your checklist should have a specific item for this: on the first cooling day of the season, note what comes out of the registers. That single observation tells you more about duct condition than three months of regular running.
Summer humidity is the second major trigger. New York City summers push relative humidity high enough that condensation can form on cool surfaces inside duct runs, and where there’s moisture, there’s a food source for mold spores. In a Hell’s Kitchen walkup, this often shows up as a musty smell in the bathroom or kitchen when the split system first kicks on. During July and August, the checklist item is a smell test: run the system for ten minutes on a hot day, then walk each register and note whether the air smells neutral, dusty, or damp. A damp smell is a signal worth acting on.
Construction windows are the third trigger, and this is where Hell’s Kitchen differs from quieter residential neighborhoods. Street work, building facade repairs, and interior renovations all send fine particulate into the air, and if your building’s intake or your window AC unit is on the wrong side of the work, your filter picks up the load. When you see scaffolding go up on your block, tighten your filter checks for the duration. We’ve seen apartments where a six-week facade job visibly changed the filter loading pattern, and the homeowner knew to schedule an inspection because they’d been logging it.
Winter brings the radiator cycle back, and the dust that accumulated on the fins over the summer burns off in the first heat-up. That’s the familiar “first warm day” dust smell. It’s not a duct problem by itself, but it does tell you what’s been sitting in the system.
How to Read a Filter: Beyond “Looks Dirty”
A filter isn’t a yes/no indicator. Read correctly, each filter change gives you a small diagnostic report about the interior of your ducts. Most people look at a filter, decide “that’s dark, time to change it,” and lose the information. Here’s what to actually look at, in the order that matters.
- Color. A uniformly gray filter after a normal interval means the system is catching ordinary household dust. A filter with a distinctly dark, almost black band near one edge or one side means something is loading that side of the intake harder, and that’s worth investigating. A filter with rusty or brown speckles points to moisture somewhere upstream. A filter that comes out pale white after a month means the system is barely moving air, which itself is a problem.
- Texture. Rub a small section between your fingers. Fine, dry powder is normal. Gritty or sandy texture suggests construction particulate or grit from street work getting pulled in. A tacky or greasy feel is unusual in a residential system and worth a professional look. Hair and fiber clumps in a specific corner mean loose seals somewhere.
- Load distribution. A filter should catch roughly evenly across its face. If one half is dark and the other clean, the airflow is unbalanced, and the cause is often a duct run that’s partially separated or a register that’s been closed for months. This is one of the most useful readings a filter gives you, and it’s the one most people skip.
- Interval. Note how many days it took to reach that state. The interval is your data point. If the interval is drifting shorter month over month, the system is loading faster, and that’s your signal to look closer.
- Fit and seal. A filter that’s loose in its slot lets air bypass it entirely, which means everything downstream is unfiltered. Check that the filter seats snugly.
Write all five observations in a note on your phone. A month of filter data is interesting; six months is a diagnostic. When you eventually have a technician out, that log turns a vague “my air feels dusty” conversation into a specific one.
For a filter that’s loading unevenly across its face, the cause is often inside the ductwork itself, which is a reason to book a professional inspection rather than keep swapping filters. Our Air Duct Cleaning Hell’s Kitchen page explains what a full system evaluation covers.
Building a Month-by-Month Photo Log of Your Registers
The single most useful maintenance habit for a Hell’s Kitchen apartment is a photo log of your registers. Take one photo per register per month, at the same angle, with the same lighting, and you’ll have a visual record that lets you compare month over month. Dust accumulates slowly enough that you won’t notice a gradual change with your eye – but a January photo next to a July photo makes it obvious.
Here’s the process, and it takes about ten minutes:
- Frame the shot the same way every time. Stand at the same distance, use the same phone, and tap the register grille so the phone focuses on it. Wide-angle is fine as long as it’s consistent.
- Photograph the vent face and the grille slots, not just the room. The buildup inside the slots is the data. If you can, angle the phone to catch the interior lip of the register.
- Catch a light source. A flashlight angled across the register slots at a low angle shows dust accumulation far better than straight-on light. If a flashlight isn’t handy, use your phone’s flash from the side.
- Note the date and the filter interval in the same note. “Register 3, kitchen, Jan 15, filter changed Jan 2.” The two are more useful together.
- Add the smell observation. A one-word note (“neutral,” “dusty,” “damp”) next to each register photo gives you a smell timeline, which matters for moisture detection.
Do this in a consistent week if you can. First weekend of the month works. The point isn’t the discipline for its own sake; it’s that after four or five months, you can actually see whether your registers are getting dirtier, staying stable, or cleaning up after a service.
When a technician does come out, the before-and-after photos of your own ducts become the standard you’re comparing against. That photo log you’ve been keeping lets you verify the work was actually done rather than take someone’s word for it. If you want to understand what a proper professional cleaning looks like on the other side of the camera, see air duct cleaning for the full scope of what’s involved.
Checklist for Radiator Heat + Split-System Apartments
A lot of Hell’s Kitchen apartments run two systems: the original radiator heat from the building, and a supplemental split-system AC unit added later. This combination creates duct maintenance items that a single-system home never deals with, and most generic checklists ignore it entirely.
Radiator systems don’t use ducts for the heat itself, but the convection currents they create pull huge volumes of air across the apartment, including past any registers, and the dust that settles on radiator fins gets burned off once a year. Split systems use their own headers, and those are the surfaces most exposed to the apartment’s air quality. The interaction between the two is what makes this checklist different.
Each season, work through these items:
- Radiator fin dust check. Run a hand down the fin surfaces. If a visible gray layer transfers onto your fingers, that fin dust will burn off the first time heat comes on. Clean the fins (a vacuum with a brush attachment works) so it doesn’t end up airborne.
- Split head pre-season check. Before the first cooling use, look at the intake grille on the split head. If it looks grayed out at a glance, it’s loaded. Remove the filter on the split head if it’s a removable type and inspect for the same color/texture readings you use on your furnace filter.
- Register condition at the split head. Where the split head connects to the duct run, look for dust streaks trailing away from the connection. Streaking is a sign of a seal that’s blown out, and it means unfiltered air is being pulled into the system from the wall cavity.
- Radiator dust doesn’t equal duct dust. It’s easy to confuse radiator fin dust with a duct problem. If your air smells of burned dust the first time heat comes on but clears within an hour, it’s a radiator fin issue, not a duct issue. If it never clears, that’s different.
- Check the gap around the split head. The hole cut for the split head and the surrounding wall should be sealed. If you can feel air moving around the head when the unit runs, you’re losing conditioned air into the wall cavity.
- Coordinate the two systems’ cleaning. When you do call for a full cleaning, ask for both systems to be assessed in the same visit. The split system’s coils and the ducted system’s registers share the same air, and a technician who assesses both together gets a better picture of total apartment air quality.
If you’re thinking about upgrading your filtration across both systems, whole-home filtration and humidity control modules from brands like Honeywell and Aprilaire are common in these setups and worth discussing with a technician while they’re already on site. Those systems also work with the pre-existing ductwork, so getting both right is a two-part problem worth solving in one appointment.
For the full-scope version of this visit, including the HVAC components themselves, our HVAC cleaning page breaks down what a professional inspection and cleaning covers on combined systems.
Red-Line Thresholds: When “Monitor” Becomes “Call Now”
Most duct issues are gradual, and most of the time “monitor it” is the right answer. But there are specific, observable conditions that move an item off the monitoring list and onto the call-a-professional-immediately list. These aren’t judgment calls; they’re thresholds. Know them in advance so you don’t second-guess yourself at the moment.
Call a professional immediately if you observe any of the following:
- Visible mold growth inside a register, on the duct interior you can see into, or on the split-system head. Mold on duct surfaces means there’s a moisture problem worth evaluating by someone trained in remediation. Don’t spray a consumer product onto it. Call.
- A persistent damp or musty smell in more than one room, especially if it’s stronger when the system runs. That smell isn’t dirt. It’s an indication that moisture has gotten somewhere it shouldn’t be.
- Streaking at duct joints or around register frames – dark trails of dust moving away from a seam. That’s a failed seal drawing unfiltered air into your system.
- Pest evidence – droppings, gnaw marks, or nesting materials visible at a register. Rodent and insect activity inside a duct system is a health concern that requires an industrial-grade cleaning, not a shop vac.
- A filter that comes out rust-orange or brown, or one that smells strongly of damp. That points to a moisture source inside the system and shouldn’t wait.
- Any burning smell when the system runs. This one isn’t about duct maintenance; it’s about electrical and heating safety. Shut the system off and call a professional.
- A sudden, large cloud of dust from a register on startup, especially after a period of non-use. A puff is normal; a heavy discharge after a warm-up period usually isn’t.
On the monitoring side, the items that stay in the “watch” category are: light filter loading within the normal interval, a faint radiator dust smell at first heat of the season, and slow accumulation on the register face that’s consistent month over month. Those get another photo and a note, not a call.
When a red-line item does turn up, home-grade equipment often isn’t enough. The right tool for a mold or pest remediation job is proper negative-air containment, and that’s the kind of gear a professional duct cleaning company runs. The brands we work with – Abatement Technologies containment units for negative-air pressure, Rotobrush rotary-brush systems for the duct interior, Nikro vacuums for high-capacity extraction – exist specifically for cases like this.
The Annual Hell’s Kitchen Duct Maintenance Calendar
Here’s what a realistic twelve-month checklist looks like for a Hell’s Kitchen apartment. The exact months shift based on whether your building runs hot-water or steam heat, and whether your split system gets summer use, but the sequence is consistent.
- January – February (deep winter): Monthly filter checks per the reading criteria above. One photo per register. Note the radiator dust situation. Check that the split-system head is clean and idle, and that no dust has settled into a visible layer on the head.
- March (pre-transition): Pre-season split-system check before the heating transitions to cooling. Inspect the split head intake grille and consider whether the coils need attention. Photo log stays steady.
- April – May (transition and construction season): First cooling day – observe what comes out of each register. Tighten filter checks during any nearby construction or scaffolding work. This is the highest-load window of the year in Hell’s Kitchen. If you’ve been thinking about scheduling a professional cleaning, this window and the one in the fall are the ones where the return is highest.
- June – August (humidity): The monthly smell test becomes the most important entry. Run ten minutes, smell each register. Any damp smell moves to red-line. Photo log continues.
- September (post-summer check): End-of-summer inspection of the split head. Look for dust streaking, seal degradation, or condensate issues. Compare this month’s register photos to July’s; a big jump means the summer was hard on the system.
- October – November (pre-heat): Radiator fin cleaning before first heat. Filter checks. Review the year’s photo log and decide whether to schedule a full cleaning for winter.
- December (steady state): Routine filter checks, register photos, one deep inspection if the year’s log shows a trend. This is the month to note the interval data before the holiday season.
On top of the seasonal calendar, add a full whole-system cleaning every two to three years as a baseline. If you live near active construction, have pets, deal with allergies, or have a household member with respiratory concerns, lean toward the shorter end. For a full walkthrough of what that professional visit actually involves, see Air Duct Cleaning Hell’s Kitchen for the process and what gets included.
Dryer Vent: The Item Most Checklists Leave Off
Duct maintenance checklists for apartments almost always skip the dryer vent, and that’s a mistake. The dryer vent is a duct system too, it sits in the same air you’re trying to keep clean, and it carries a fire risk that the rest of your ductwork doesn’t. Lint accumulation in a dryer vent is one of the more common causes of residential fires, and it’s a problem that doesn’t show up as a dust smell or a dirty register; it shows up as a dryer that takes longer to dry a load.
Add these items to your annual checklist:
- Watch drying time. If a load that used to take 45 minutes takes 60, note it. Drifting drying time is the earliest signal of vent loading.
- Check the vent hose behind the dryer. A crushed or kinked hose creates a bottleneck that traps lint even if you clean the rest. If the hose behind the dryer is the flexible foil type, replace any crushed section with a smooth metal run if your building allows it.
- Inspect the exterior vent. Where the vent exhausts to the building exterior, check that the flap opens freely and that no visible lint is clogging the hood. If you can’t reach or see it, that’s a job to have looked at.
- Feel the exhaust air. With the dryer running, feel the air coming from the exterior vent. If it’s weak, the vent is loading.
- Have it cleaned professionally every one to two years. This is the one duct maintenance item we’d recommend on a firm schedule rather than an as-needed basis, because the risk it addresses is different from dust.
Our dryer vent cleaning service exists as its own job for exactly this reason: it’s a fire-safety service, not an add-on. If your annual checklist is going to include one “schedule this” item, this is the one. While a technician is there, it’s a natural moment to have the air system inspected too, since the two are handled by the same professional scope.
Common Mistakes to Avoid
- Using a fixed 90-day filter rule. Hell’s Kitchen filters load at wildly different rates depending on whether your block has scaffolding up. Read the filter’s interval data instead of trusting a calendar. If your interval is drifting shorter, something is loading the system.
- Judging filter condition by color alone. The most diagnostic filter signal is load distribution, not overall dirtiness. A half-dark filter with an otherwise clean face means unbalanced airflow, which is worth investigating even if the filter doesn’t “look dirty” yet.
- Assuming the first-heat dust smell is a duct problem. It’s usually radiator fins, not ductwork. Confusing the two leads to a cleaning when a fin vacuum is what’s actually needed.
- Skipping the photo log because it feels fussy. Six months of consistent register photos is the single most useful piece of documentation you can have, both for catching problems and for verifying a professional cleaning actually changed anything.
- Calling a duct cleaning when a seal repair is needed. Leaky duct joints draw unfiltered air directly into the system. Cleaning without sealing fixes the symptom but not the cause. Ask specifically whether sealing is part of the scope.
- Ignoring dryer vent lint because the dryer “still works.” A dryer working slower than it used to is working against a loaded vent. This isn’t a cleaning nuisance; it’s a fire-safety item, and “still works” isn’t the standard.
- Treating a red-line condition as a monitor item. Visible mold, persistent damp smells, pest evidence, or joint streaking are calls, not notes. Waiting on these doesn’t make them go away, and it makes the eventual fix bigger.
See the difference
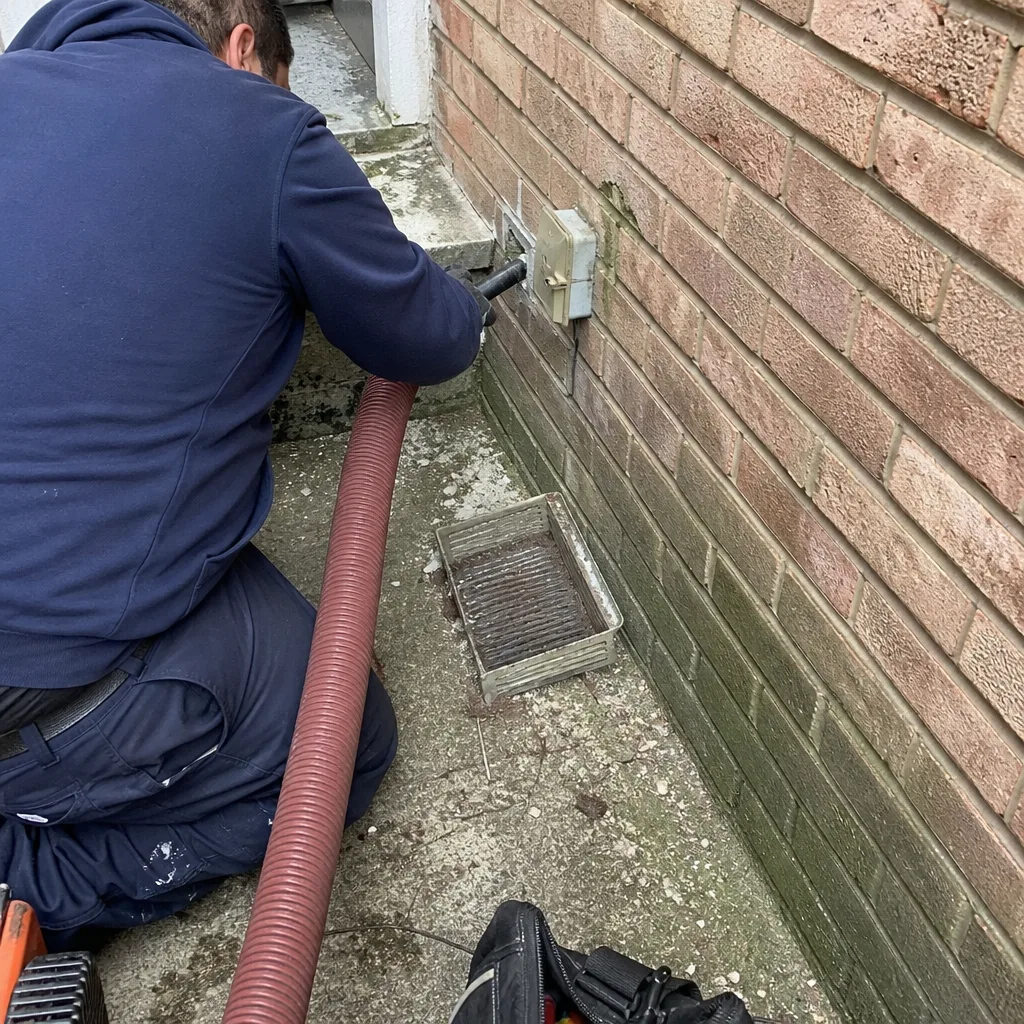 Before
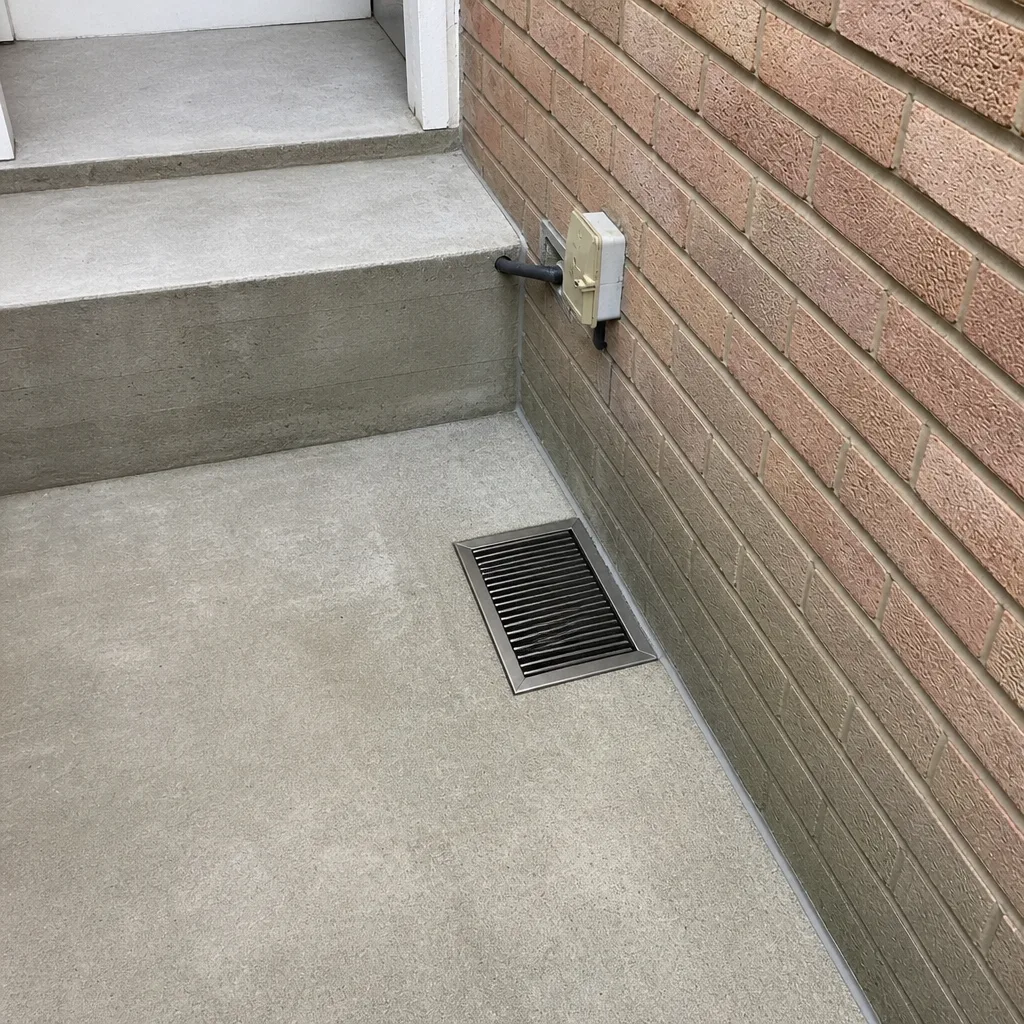 After
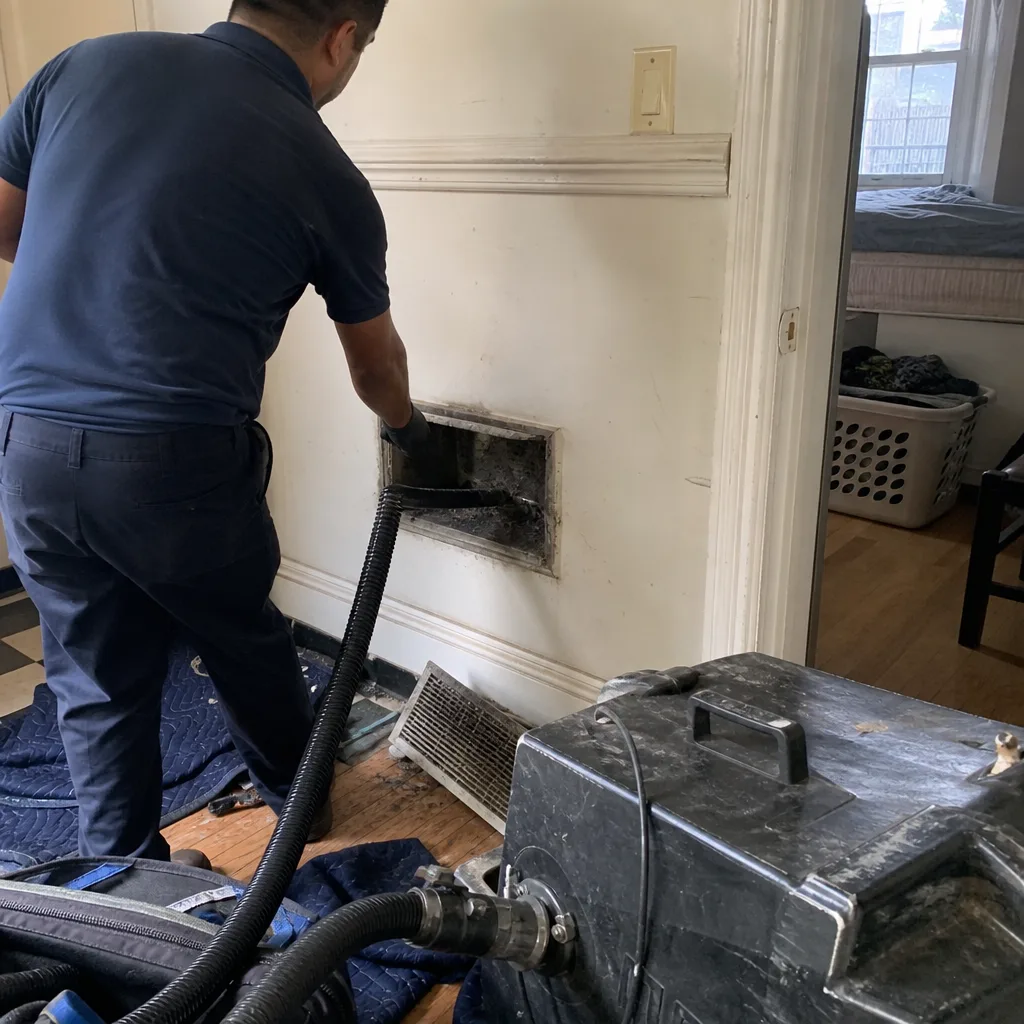 Before
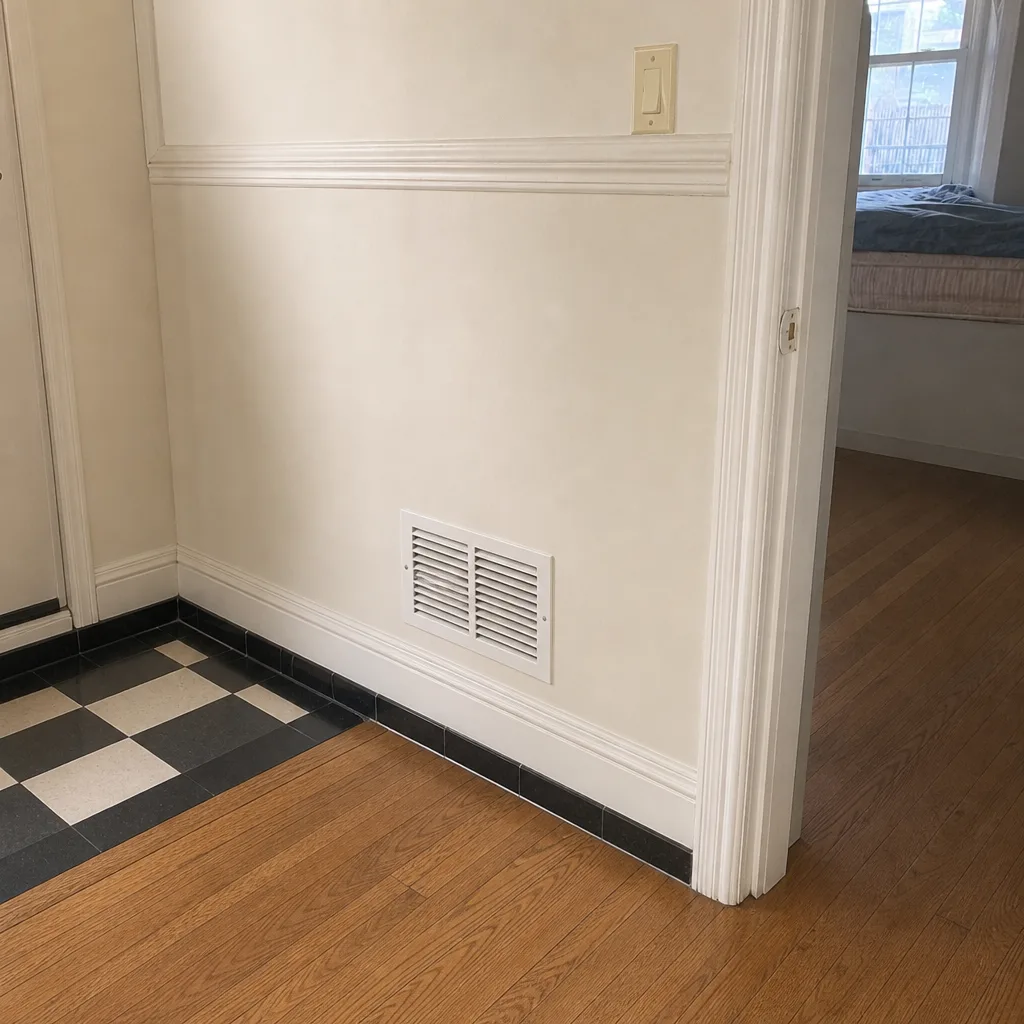 After
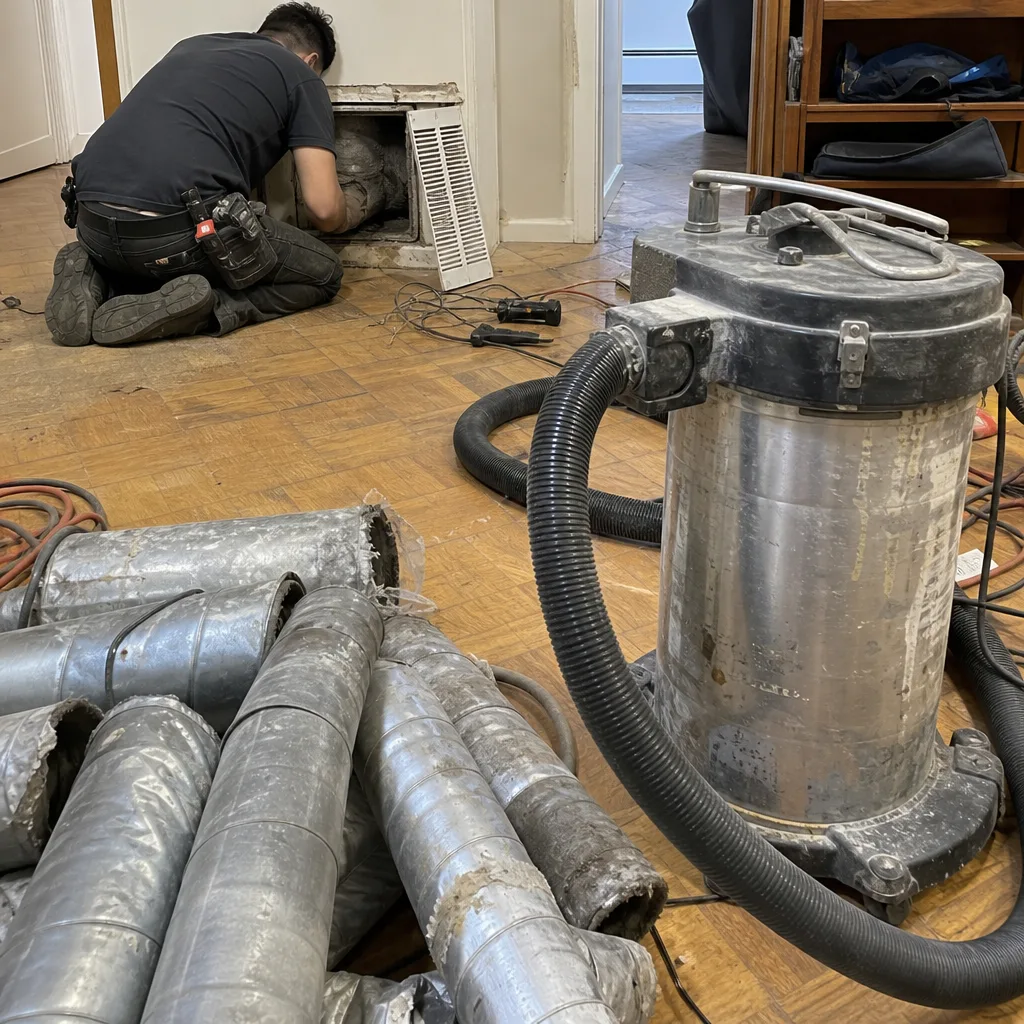 Before
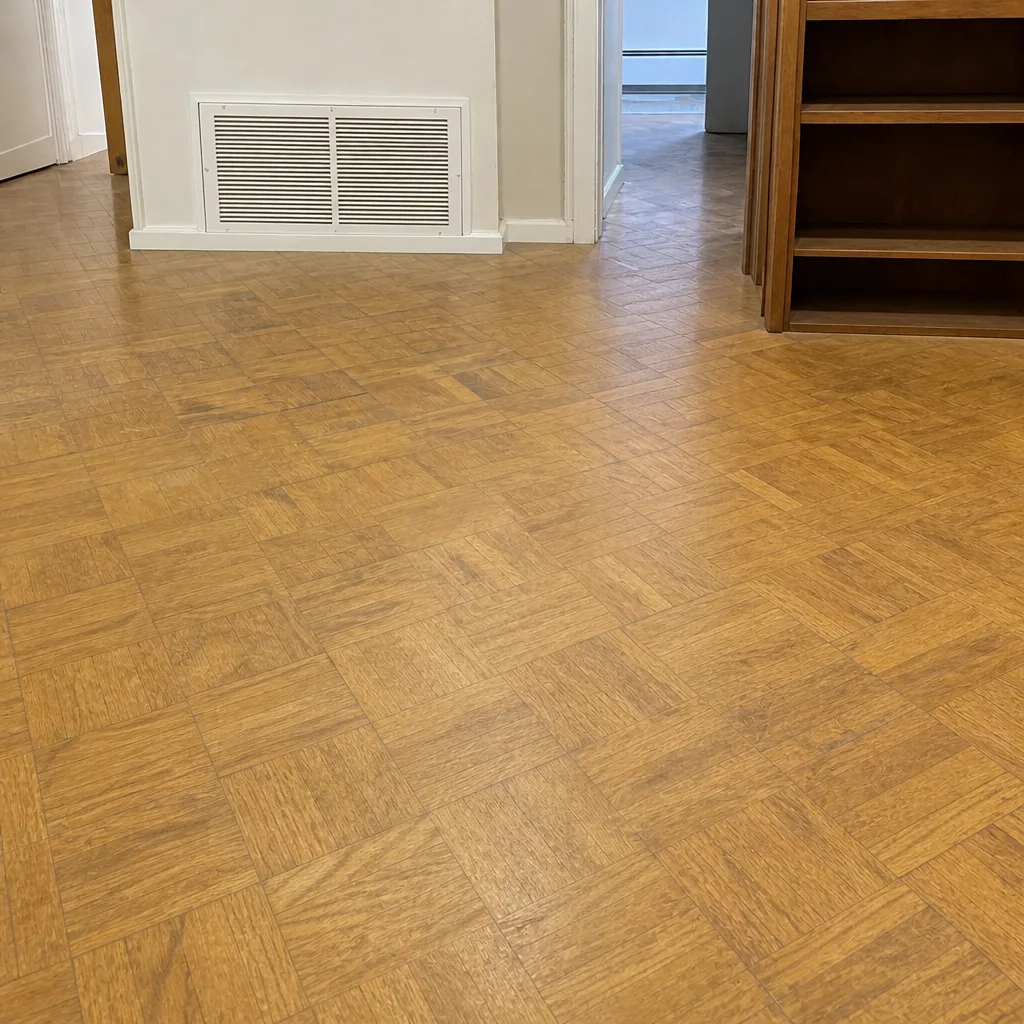 After
When to Call a Professional
Call a professional if you’ve observed any of the red-line conditions above – visible mold, a persistent damp smell across multiple rooms, pest evidence, brown or rust-colored filter loading, or dark streaking at duct joints. Also call if your photo log shows a clear upward trend in register accumulation over two or three consecutive months even without a specific trigger, if anyone in the household has developed new allergy symptoms that correlate with the system running, or if you can’t remember the last time the dryer vent was cleaned. Air Duct Cleaning Hell’s Kitchen offers free estimates in Hell’s Kitchen – call (833) 468-5937. We answer 24/7. Fast dispatch from 7am to 7pm, Sunday through Friday. The estimate is free, and one flat price is agreed before work starts.
Frequently Asked Questions
Every two to three years is the usual starting point for a Hell’s Kitchen apartment, but the shorter end of that range applies if you’re near active construction, have pets, deal with allergies, or live in a building with a mixed radiator and split-system setup. Your own filter and photo log data should override the general interval; if the log shows rapid loading, don’t wait out the two-year mark. Call (833) 468-5937 for an exact quote on your system – estimates are free.
Typical full-system cleaning for a Hell’s Kitchen apartment runs in a range set by the size of the system and what’s included in scope, and the final number is set by the written estimate after the technician has seen the ductwork. We don’t quote per-vent prices or a teaser figure; per-vent pricing is where most bait-and-switch stories start. The honest answer is that the price depends on what’s actually in your ducts, which is why the scope and price get set before work begins. Call (833) 468-5937 for an exact quote – estimates are free.
Cheap quotes usually reflect a smaller scope – a shop vac and a single pass through visible registers rather than a full negative-air cleaning of the entire system with rotary-brush agitation of the duct interior. A shop-vac pass doesn’t reach the interior walls of the duct, doesn’t create negative pressure to stop dust migrating into living space during the cleaning, and doesn’t seal leaks. Our technicians run Rotobrush rotary-brush systems, Nikro high-capacity vacuums, and Abatement Technologies containment units because that’s what a real cleaning requires. If a quote seems too low, ask what equipment it involves. Call (833) 468-5937 for a scope comparison – estimates are free.
Two things: before-and-after photos of your own ducts, and your own before-and-after register photo log. A professional cleaning should be able to show you the interior condition of the duct before and after, not just hand you an invoice. Your photo log from the checklist lets you independently verify the difference on the register end. If you’ve been logging monthly and the register faces look visibly cleaner a week after the service, you have independent confirmation. Call (833) 468-5937 to schedule a cleaning and ask for the photo documentation in advance.
Yes, mainly in what drives contamination. Hell’s Kitchen has steady street traffic, frequent construction windows, older pre-war buildings with retrofitted split systems, and summer humidity that pushes moisture into the system during cooling season. Those local triggers mean duct issues show up on a seasonal pattern specific to this neighborhood rather than evenly across the year. A checklist built for this area should reflect that, which is what this guide is for. Call (833) 468-5937 for an assessment specific to your building – estimates are free.
Low-floor, street-facing apartments in Hell’s Kitchen tend to load filters and registers faster because street dust and traffic particulate are closer and more direct. If your unit faces Tenth Avenue or Ninth Avenue, or if there’s regular truck traffic on your block, check your filters more often and stay on top of the photo log. The general cleaning interval can stay the same, but the monitoring cadence should be tighter. Call (833) 468-5937 if you want a professional opinion on your specific setup – estimates are free.
The Bottom Line
A duct maintenance checklist for a Hell’s Kitchen apartment works best as a diagnostic tool, not a calendar reminder. Read your filters for interval, load distribution, color and texture. Keep a monthly photo log of your registers so you can see change over time. Add the summer humidity smell test and the construction-window tightening to your schedule. Know the red-line conditions cold so you don’t hesitate when they appear. Add the dryer vent to the annual list because it carries a fire risk the rest of the ductwork doesn’t. And treat the professional cleaning as the scheduled item on top of the ongoing monitoring, not a replacement for it. Our technicians have up to 14 years of experience working with residential duct systems and the industrial-grade equipment this work requires – Rotobrush, Nikro, and Abatement Technologies – and can help you read your system’s signals and decide what it actually needs.
Ready to turn your checklist into an actual assessment? Call (833) 468-5937 for a free estimate. We answer 24/7. Fast dispatch from 7am to 7pm, Sunday through Friday. One flat price per system, agreed before work starts, with before-and-after photos of your own ducts. If you want to see the full scope of what a professional cleaning involves, start with Air Duct Cleaning Hell’s Kitchen, and when you’re ready for the full air-quality picture, we can help you plan the whole scope in one visit.
Written by the team at Air Duct Cleaning Hell’s Kitchen.